
This article will also cover the default Client Portal options and demonstrate how a client can use both the block scheduling system and the inventory system to make their own appointments and select their own products.
Note: The Client Portal is optional and carries with it additional charges.
Definition
The Client Portal is an e-commerce style ordering tool allowing your clients to self-register, book appointments, and pick out their own items. Options are adjustable based on the individual's pantry's needs. It is designed to work in tablet, smartphone, or desktop web browsers.
Note: At any time, you can click on the globe icon at the top right of the screen to change languages.
Signing up a New Client
Follow these steps to create a new account and sign in to that account.
- Access the Client Portal
Navigate to your pantry's online Client Portal URL.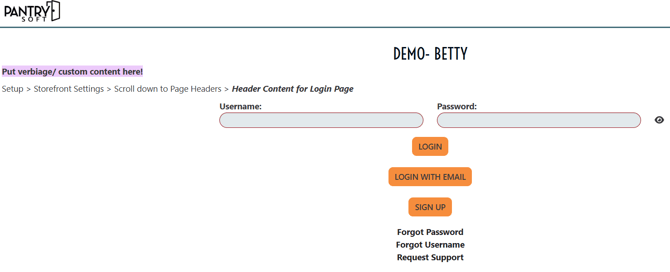
- Create a New Account
Click or tap Sign Up to create a new account - Enter Your First Name, Last Name, Username, Email, and Password
Passwords must be at least 8 characters in length and must include at least one uppercase letter (A-Z), lowercase letter (a-z), and number (0-9). Optionally you can enable an account number field which can be used by organizations for a variety of purposes--for example: Student ID.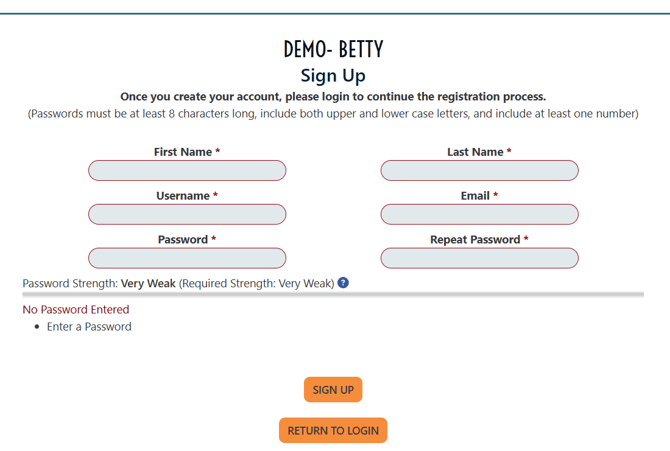
- Save Your New Account Information
Click or tap Sign Up to record your information. This will return you to the initial login screen.


Registering
Follow these steps to register a new client
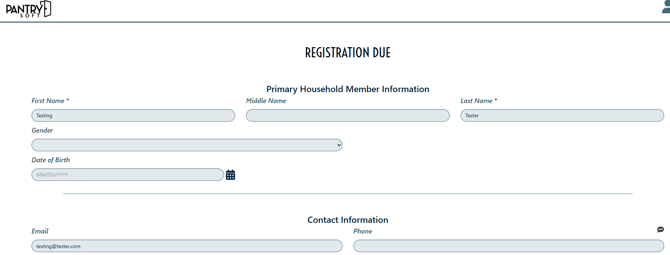
- Log in
On the initial Client Portal screen, enter Username and Password. Click or tap Login. - If This is Their First Visit, a New Client Must Register
The registration form will already have the First Name, Last Name, and Email filled out. By . -
Click Save and Exit.
Note: If you only want to use the client portal for clients to register, make sure that this setting under Setup -> Storefront Settings is set to Yes:![]()
Scheduling
Follow these steps to schedule a visit and select your pantry items.
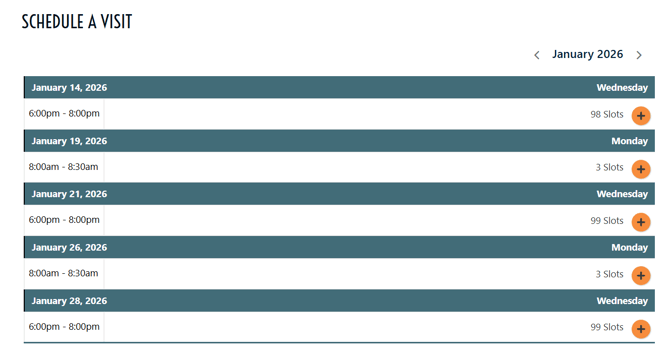
- Schedule a Visit Time
Next, you will be able to schedule your visit using one of the available scheduling blocks. Click or tap the plus icon on the right side of the screen to select your preferred time slots.

Note: If you don't want clients to be able to order on the shopping cart you will want to make sure that the following scheduled template setting is set to Yes:![]()
Shopping
-
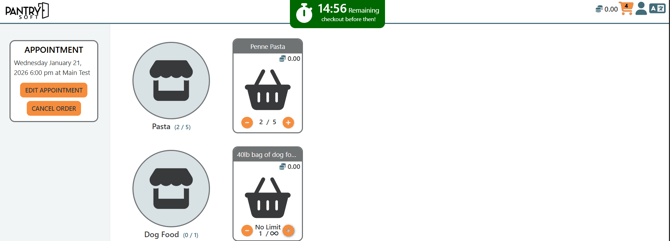
Now You Can Select Your Items
Click or tap the plus icon on each individual item to add them to your cart. Click or tap on the minus icon to remove them from your cart.
Note: Each item has limits noted below the icon or photo. Also, each type of item (i.e. Meat, Vegetables) may have a maximum total amount per visit. As soon as these items are selected, they are reserved from the pantry's current inventory. If no action is taken for 15 minutes, the transaction is cancelled and the items are returned to the pantry's inventory. The exclamation "!" next to a quantity indicates that the maximum amount has been selected.
-
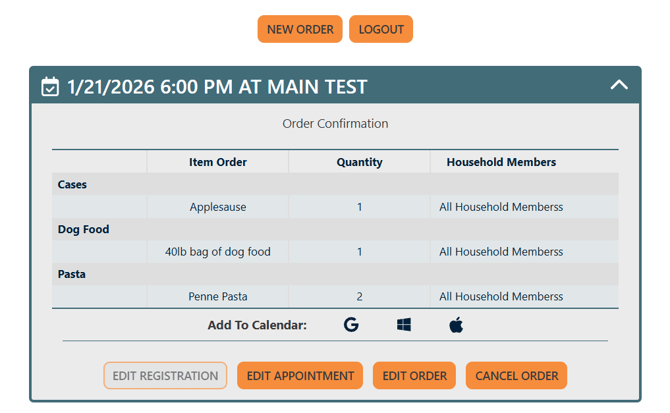
Confirm Your Order
Once you have made all of your selections, click on the shopping cart icon on the top right or select Open Cart to Checkout to review your order. Click or tap Checkout Now! to finalize.

Note: You can adjust the total quantities from this screen using the plus and minus icons. You can review, but not change, the selected time slot. To pick a new time slot, you must wait 15 minutes for the order to expire, then start a new order.
Click or tap the user icon on the top right to see a Logout pop-up. Click or tap Logout to exit.