
Definition
In PantrySoft, an Inventory Item Tag is a descriptor you can attach to various items (i.e., Peanut-Free, Vegetarian, Kosher). These tags will appear inside the item tiles in the online choice pantry. Optionally, some or all of these tags can be included in a filter panel, allowing users to click these filters and see only the items matching these categories.
Note: This tutorial assumes you have purchased and activated the online store PantrySoft feature-set. Currently Item Tags are not integrated into the Kiosk and Admin interfaces.
Creating Item Tags
Perform the following steps to create an Item Tag:
- Go to Inventory Tags
Go to Inventory->Item Tags.
- Create a New Tag
Click New Item Tag.
- Supply Necessary Fields
Enter information for the fields in Inventory Tag Fields below. - Save and Exit.
Click Save and Exit.
Inventory Tag Fields
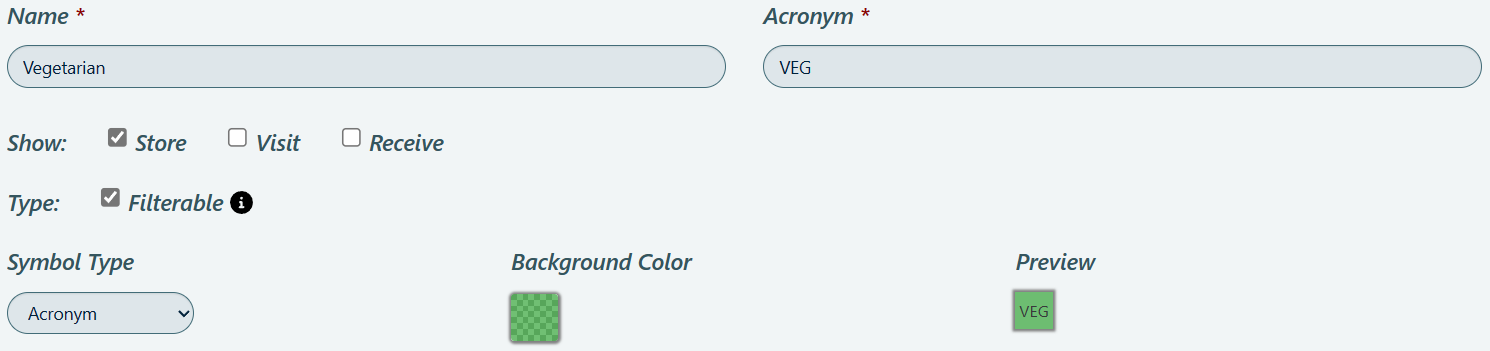
- Name. Descriptor appearing on the pullout list of filters
- Symbol Type.
Item Tag images are based on one of the following options:- Acronym. Use just a few keyboard characters to create an icon for the tag.
- Icon. Choose from a preset list of icons to create an icon for the tag.
- Image. Upload an image from your hard drive to create an icon for the tag.
- Acronym. 2–3-character short code used to create the tag icon if you've selected Symbol Type: Acronym. (i.e., "VEG" to act as a vegetarian item tag icon).
- Filterable. Check this box if you wish the tag to serve your online customers as a filter, removing items from their view that aren't tagged with the item tag.
- Background Color. Provide a background color for the icon, regardless of your choice of Symbol Type.
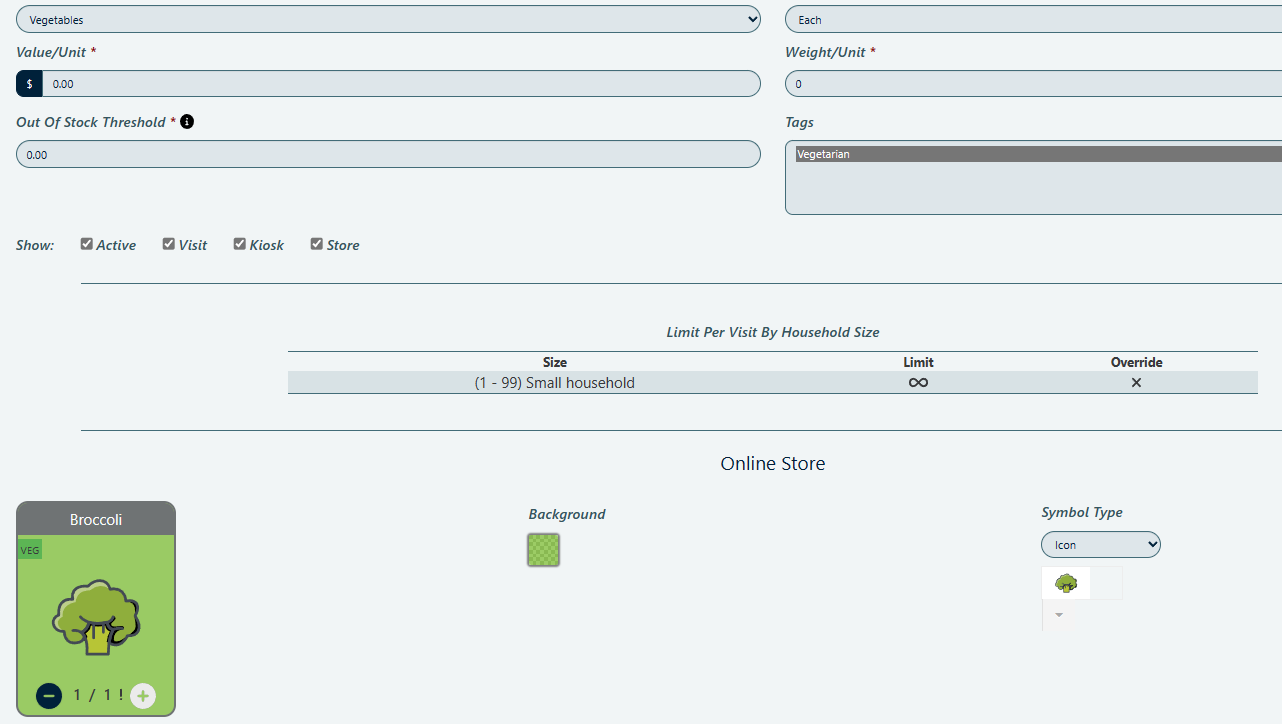
Assigning/ Attaching Item Tags
- Go to Inventory Items
Go to Inventory->Item
- Edit an Inventory Item
Click the Edit button next to one of the items. - Select an Item Tag
Select one or more of the item tags you created previously as appropriate to the item (i.e., choose "Vegetarian" tag for a Broccoli item). - Save and Exit
Click Save and Exit. This item is now tagged with the Item Tag(s) you selected and will appear as such in the online choice pantry.
Online Store: Filtering by Item Tags.
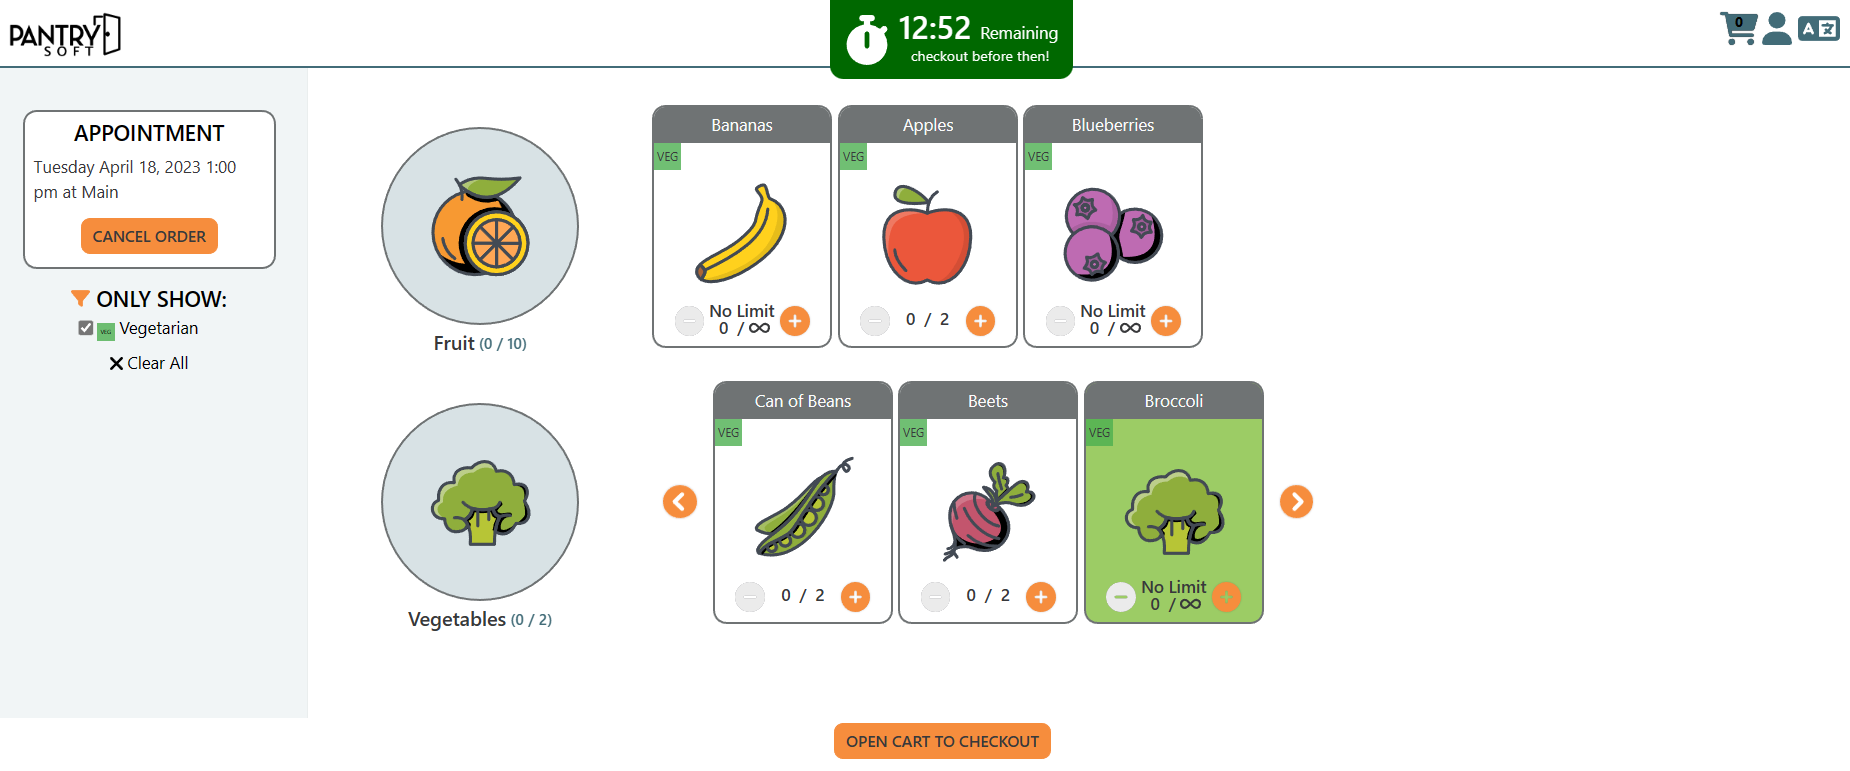
Online Choice Pantry with Vegetarian tag selected
(note all visible items have the Vegetarian tag in the upper left corner)
Perform the following steps to filter your storefront experience as an online pantry shopper:
- Login to Your Local Pantry's Online Portal
Go to the URL provided by your pantry (i.e. app.pantrysoft.com/login/mylocalpantry)
- Navigate to the Choice Pantry.
Fill in necessary fields on Registration and Schedule screens, should they appear. Now you should see the storefront. - Click an Item Tag
Click on a tag in the Only Show filter panel. For instance, in the figure above, the user has clicked the Vegetarian tag, and only those items with the apple-icon Vegetarian tag remain on the screen.