
Definition
An Inventory Source in PantrySoft is an outside entity with which you exchange Items. Most commonly, admins record inbound inventory as a Receive action, and designate an Inventory Source as the source of those items (e.g. "Walmart", "TEFAP"). You can optionally send food outbound to a Source when performing a Source Distribution action, especially institutional donors like USDA or a local businesses like grocery stores.
Inventory Sources can optionally be designated with a single Source Type. A common example is creating "Private Donor" and "Institutional Donor" types. This helps to filter and sort bulk Receives on reports.
Creating an Inventory Source
Although it's an optional step, PantrySoft recommends you create a set of Inventory Source Types before creating your sources.
Add Source Types (Optional).
Admins can create Source Types simply by adding them to the Source Type picklist.
To add Source Types, perform the following steps:
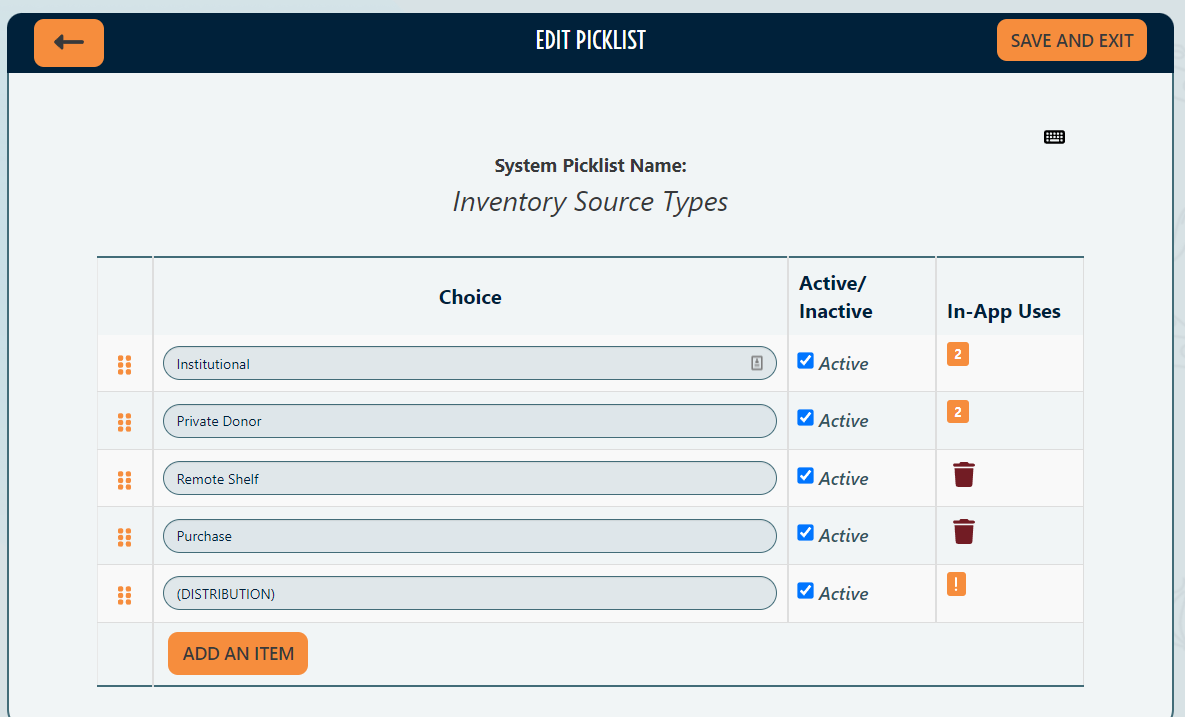
- Edit Picklist
Go to Setup->Picklists, and edit the Inventory Source Types picklist. - Add Source Types
Add Source Types that make sense (we recommend as a default adding a "Private Donor" and "Institutional Donor" option; also "Purchases" is another popular option). - Save and Exit
Click Save and Exit.
Now you can now designate an Inventory Source with one of your new Source Types.
Add Sources
Admins can create Inventory Sources on their own, dedicated screen (Inventory->Sources), but they can also add them on the fly as they perform (e.g.) Receives and Source Distributions on the Management Screen (Inventory->Management). The following instructions assumes you'll create a new Source from the Source screen (pictured below).
Follow these steps to create an Inventory Source to be used to receive Inventory:
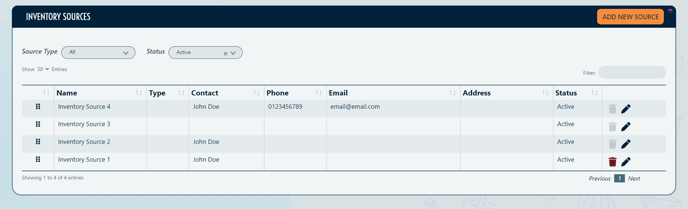
- Go to Inventory Sources
From the menu, go to Inventory->Sources. - New Source
Click New Source. - Enter Source Info
The only required field on the Inventory Source screen is Name. The other fields are provided for your record keeping convenience.
(NOTE: The non-required fields come in particular handy if you're creating thank you notes for private donors at the end of the year, or when immediately issuing receipts in the form of Receive Tickets (see the Inventory Receives).
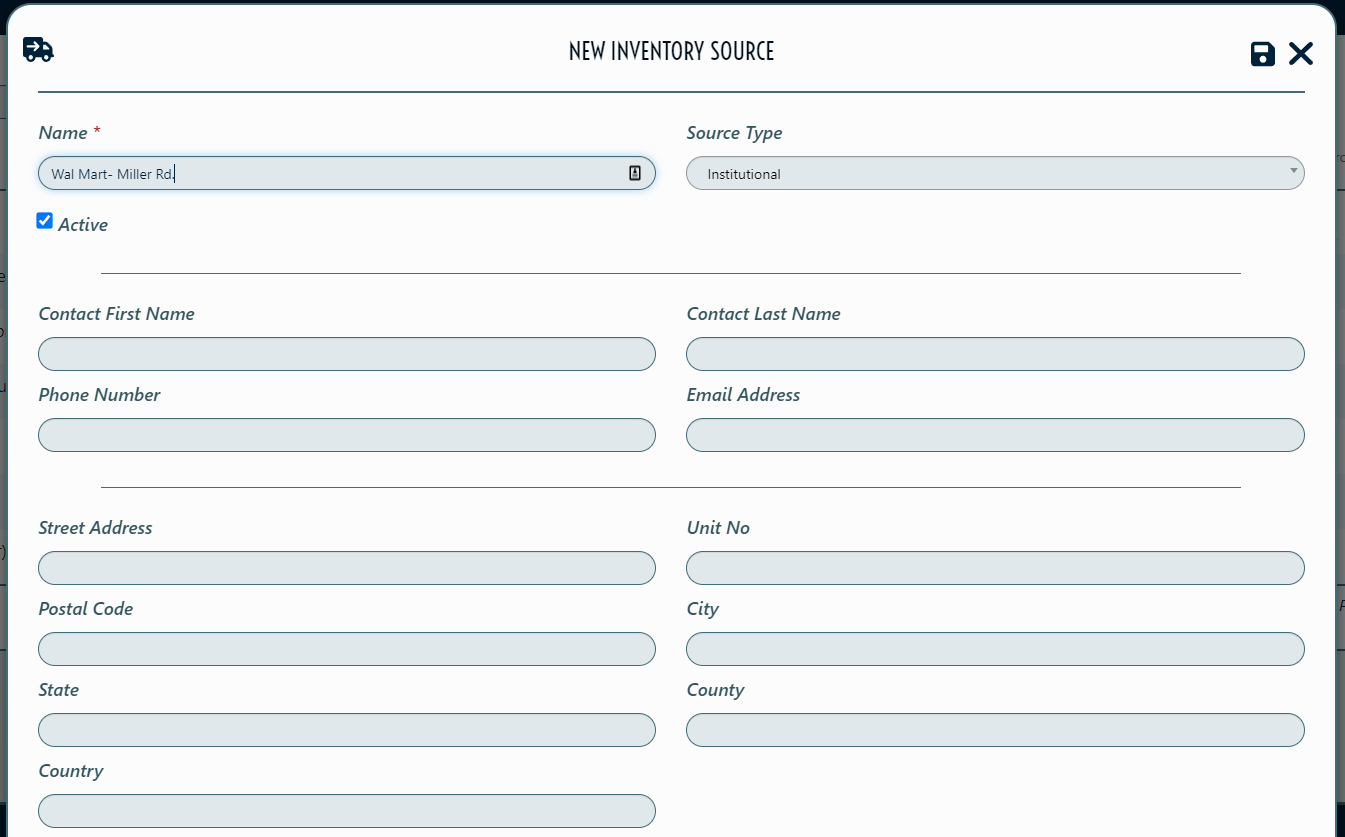
- Save Source
Click Save and Exit to build add the Source to your system.
Editing and Deleting an Inventory Source
Follow these steps to find, edit, and delete Inventory Sources.
- Find the Source to Edit.
Locate the item you wish to edit or delete on the table. A few tools to make searching easier:
-
Search Field. Locate an entry by typing into the Search field on the top right above the table. This search field filters the table to only show entries that match your search.
-
Show 'x' Entries. Click the drop-down entries menu on the top left and change the value to limit the number of rows displayed on the page.
-
Column Sorting. At the top of each column, next to the column description, is an up/down arrow icon. Click this to sort the column by value, either ascending or descending.
-
Previous / Next Page. Click the Previous or Next buttons at the bottom right of the table to switch to a different page. If there are multiple pages in the table, click that page's number to jump directly to it.
-
- To Edit an Inventory Source
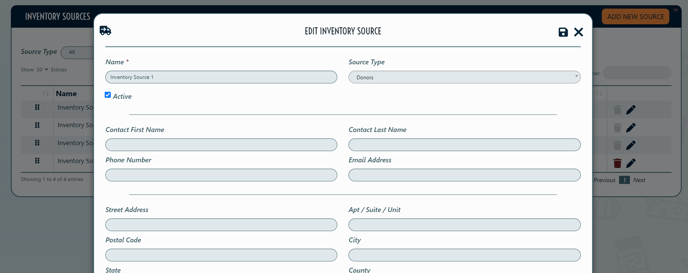
Click Edit on the target source's row. This will load an Edit Inventory Source screen, which is functionally the same as a New Inventory Source page. - To Delete an Inventory Source
Click Delete on the target source's row. Confirm the deletion in a pop-up window by hold-clicking the red Delete button. Click Cancel to return to the previous screen.
Note: You cannot delete Inventory Sources from which you have transacted Inventory Receives. This is to ensure record keeping and reporting integrity. The Delete button will be greyed out for any Source from which you have received inventory.
Note: Hover the mouse over any greyed-out button to see a message explaining why that entry cannot be deleted.