
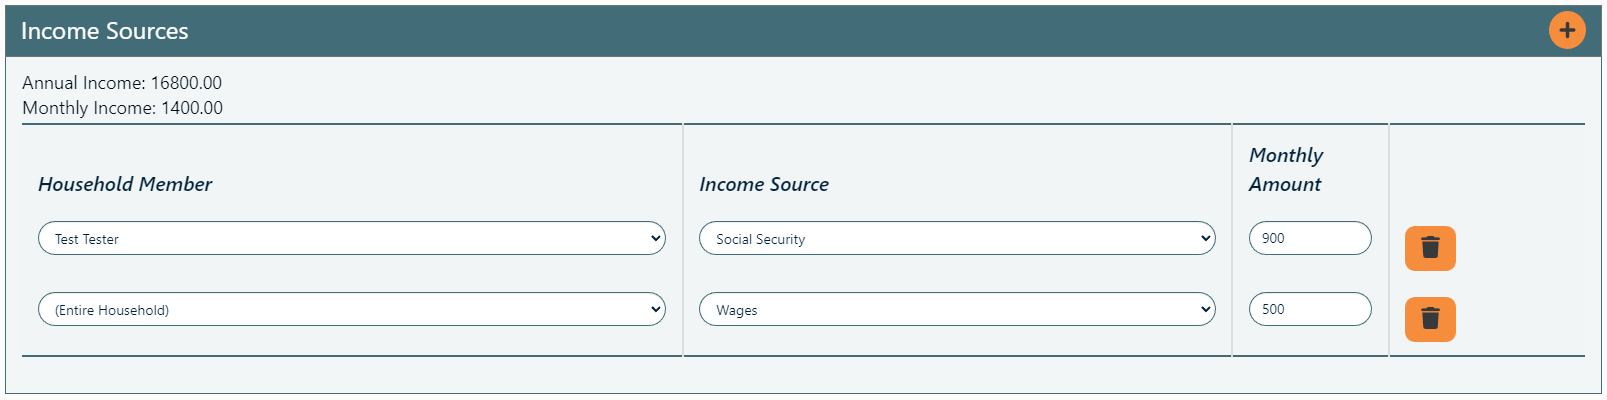
Income Widget in By Household Mode

Income Widget in By Member Mode
Definition
In PantrySoft, the Income Source widget and Expense Registration widgets are optional features that appear in their own Income and Expense section of the Registration screen. Information gathered in these widgets is hard-wired to several built-in reports inside PantrySoft.
Where did the Expense Widget instructions go? The Income and Expense widgets are set up and operate exactly the same way. The only difference in setup is that each of them has its own picklist (Income Source and Expense Source).
Basic Setup Overview
When setting up the pantry interface, perform the following steps to tailor your income & expense registration section, including optionally getting rid of it entirely:
- Toggle the Feature
To activate this feature, ensure the following settings:
- "Finance" Picklist Entries. There are active entries in the Income Description or Expense Description picklists, respectively.
- Registration setting. Income Widget Type setting in Registration Settings is set to something other than None.
- Verify the Expense / Income Picklists
The various expense sources and income sources in this widget are each their own picklist. tailor those options as you see fit (Setup > Question Picklists).
For instance, you could use this to record other social services available to every family by restricting the Income Source picklist to TEFAP, Utilities Assistance, and Other Assistance. - Choose Monthly or Advanced Income / Expense Gathering
By default, the income and expense fields record per-month dollar amounts. For more flexible/ complex calculations, turn off the Income by Month and/or Expense by Month settings in the Registration Settings.
For instance, if you want your intake employees to be able to enter an income reporting basis for your clients such as "twice yearly" or "once a week," this would require that you activate the more complex reporting fields. The standard/default method is designed to record everything in terms of monthly expenses.
Please note that in March of 2026 we added a Pay Period of Biweekly as shown in the screenshot below: 
Creating a Custom Income or Expense Source
Perform the following steps to set up your Income Source widget with the income source choices your Pantry is interested in recording (as an example, we’ll create a new source called Food Assistance, and this will become a choice for recording income in the widget):
- Log in
Ensure you’re signed on as a user with the Org Admin role. - Open the Picklist Screen
From the menu bar, navigate to Setup > Picklists - Open the Income Description Picklist to Edit
Find Income Description and click Edit. This will navigate you to a Picklist Edit screen. - Add Item
Click Add an Item. - Record Income
Type the income source (for example: “Food Assistance”) in the blank field and click Save and Exit.
At this point we’ve added a “Food Assistance” option to Income Description. It will now be available as an income source on the Income Source field on Client Registration screens.
Hiding the Income Widget and Disabling Entry Choices
Hiding the Income Source Widget altogether.
To hide the Income Source widget entirely, delete or make inactive all the options under the "Income Description" picklist.
NOTE: You cannot delete the picklist itself, nor is this necessary for hiding the widget.
Deleting or Disabling Entry Choices
To delete or disable a picklist-entry entirely, perform the following actions:
- Open the Picklist Screen
From the menu, go to Setup > Picklists - Edit Income Sources Picklist
Click Edit button next to Income Description. - Option 1: Delete Entry
Ensure the entry has no In-App Uses (see callout: "Picklist In-App Uses") and instead has a Delete button. Then click the Delete Button. - Option 2: Disable Entry
Un-check the Active / Inactive checkbox. - Save Picklist
Click Save Picklist.
Picklists: Delete or Deactivate? Records using a particular picklist entry are tallied in the In-App Uses column of the "Edit Picklist" screen. Any uses whatsoever will render the entry choice unable to be deleted. The Uses tally helps determine how many attached records use the entry; these records must be tracked down and deleted before you can delete the entry altogether, and this is typically only performed during initial setup. However, you can still disable the choice, when means it will not appear on intake screens from then on. This feature ensures that past choices using the retired choice will remain in the PantrySoft database to be queried in reports.
![]()