
Definition
A User in PantrySoft is essentially an employee login identity and associated permissions. Users have login credentials, a central, standard role, and additional roles. PantrySoft permits all organizations to create as many Users as you'd like; organization user limits only affect concurrent users, or the number of users logged in at the same time.
Store "Users" If you're using PantrySoft's Client Portal (online store), when your clients register for the store, the system will basically create a special User account for them that's hidden from the normal User list in the app. Instead, those Clients will have a Customer widget on their Client record in the Staff Dashboard which allows you to change their login credentials.
SSO Pantries! If your pantry uses SSO to authenticate their employees, new employees will have to first log in as storefront users. This seems counter-intuitive, but it's necessary to vet them through SSO first. after they "pretend" to be an online user, an existing admin will log in afterwards and "promote" them to their status as PantrySoft employee Users. From then on, their SSO login will indeed log them into one of the employee interfaces (Kiosk, Dashboard).
Creating Users
Perform the following steps to create a new user and choose its role(s):
- Login
Use an Org Admin user to login to PantrySoft. Ensure that your user role has the Org Admin role (for instance, the role included in your startup package) so that you have sufficient permissions to create new users. - Go to Users
Access Users by clicking the dropdown menu under your username in the top right corner of the PantrySoft Admin screen and selecting User Management. - Create a New User
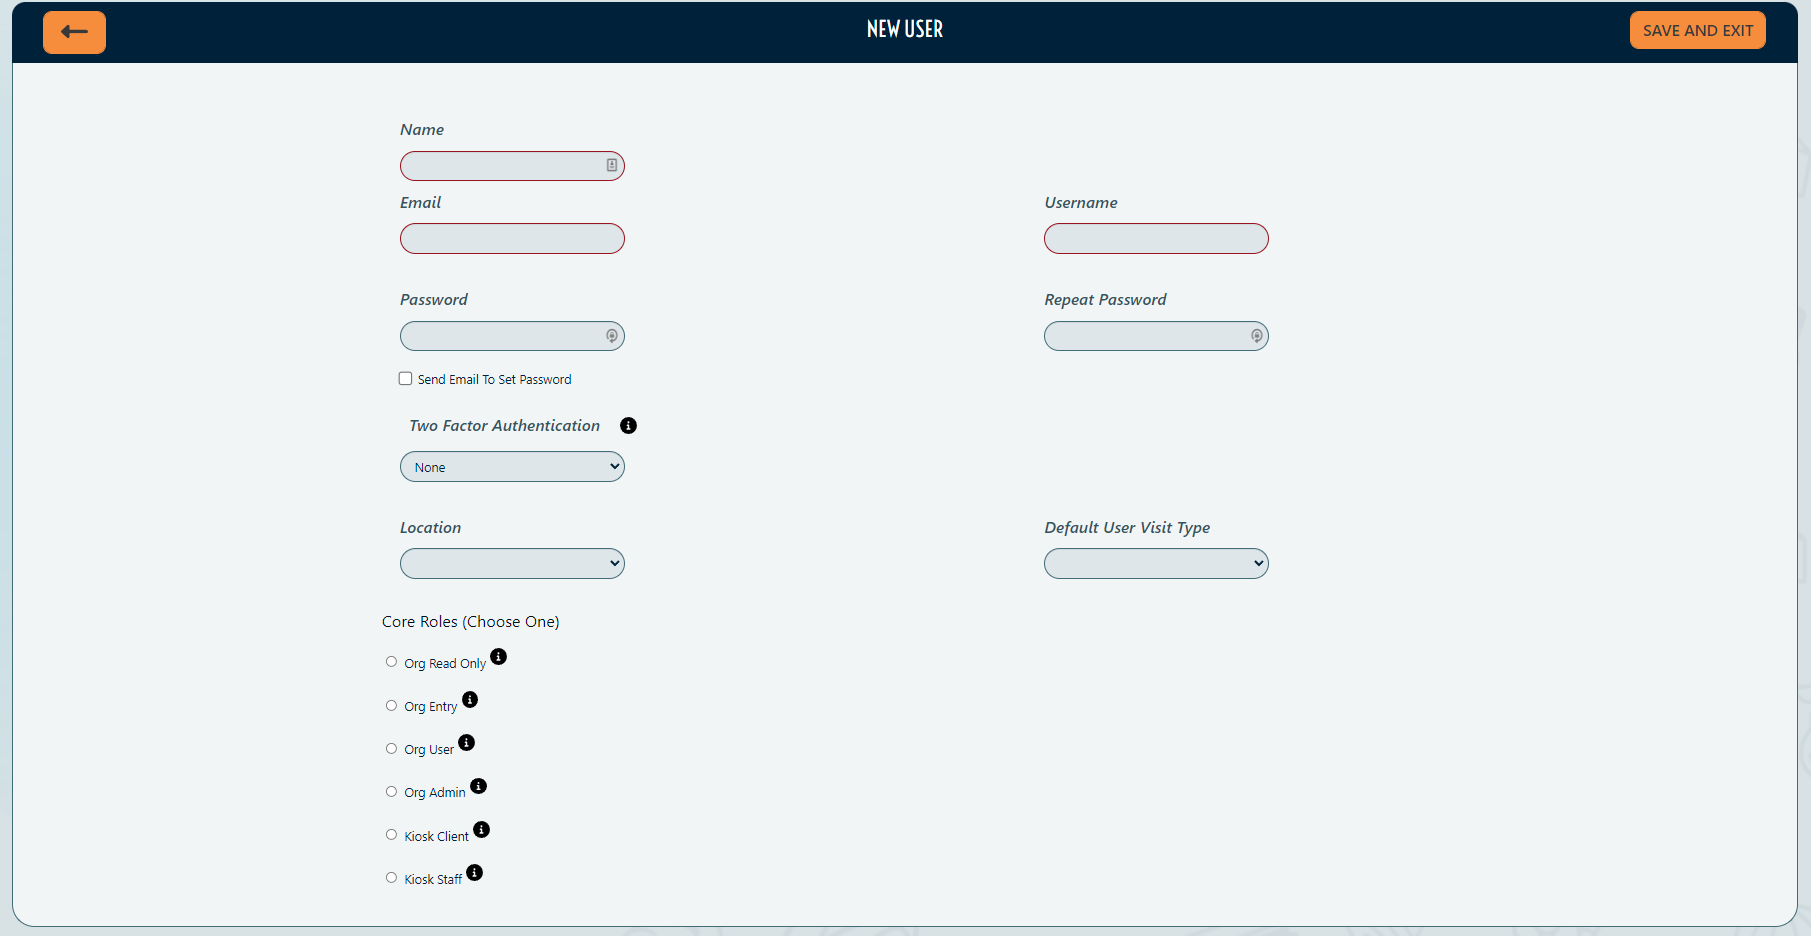
Click Create New User. This will bring you to the New User screen. - Add Core Info
Configure the new User's information. Fill out the information for the new user, including username, email, password. Ensure the password meets each of the following criteria:
- Your password must be at least 8 characters long.
- Your password must include at least one letter.
- Your password must include both upper and lower case letters.
- Your password must include at least one number.
- Choose Main Role
Choose a role from the Standard/ Hierarchical role list called simply Roles. You can choose only one. (See Standard Roles in User: Roles article.) - (Optional) Choose Additional Roles
Assign any additional roles. If you’ve given this user the Org User role or higher, click one or both of the Additional Roles which will appear to the right. (See Standalone Roles in User: Roles article.) - Save and Exit
Click Save and Exit.
Editing and Deleting Users
Perform the following steps to edit a current user:
- Login
Log in as Org Admin. Ensure you are already logged in as a user with the Org Admin role (for instance, the role included in your startup package). - Go to Users
Access Users by clicking the dropdown menu under your username in the top right corner of the PantrySoft Admin screen and selecting User Management. - (Optional) Edit User and Save
Click Edit next to a user you'd like to edit. This will bring you to the Edit User screen for that user. Change whichever fields need altering. Save and Exit. - (Optional) Delete User
To delete the user, click Delete. This will prompt you to confirm, and upon confirmation delete the user and return you to the Users List screen.