
Getting Started: Run your sample Client through a mock Visit. Distribute your sample Inventory Item if relevant.
Definition
A Visit in Pantrysoft is a record of a client visiting your pantry, and of their activity while they're there. They can be scheduled ahead of time (see Scheduling Client Appointments (Open Scheduling) for more details) or conducted ad hoc when a client visits your pantry.
Introduction
Once a client is loaded into the Staff Dashboard, you can run them through a visit. The visit widget is located at the upper right corner of the Staff Dashboard.

Creating a Visit
Perform the following steps to process a visit and verify the presence of active and visit-shown inventory items you may have created:
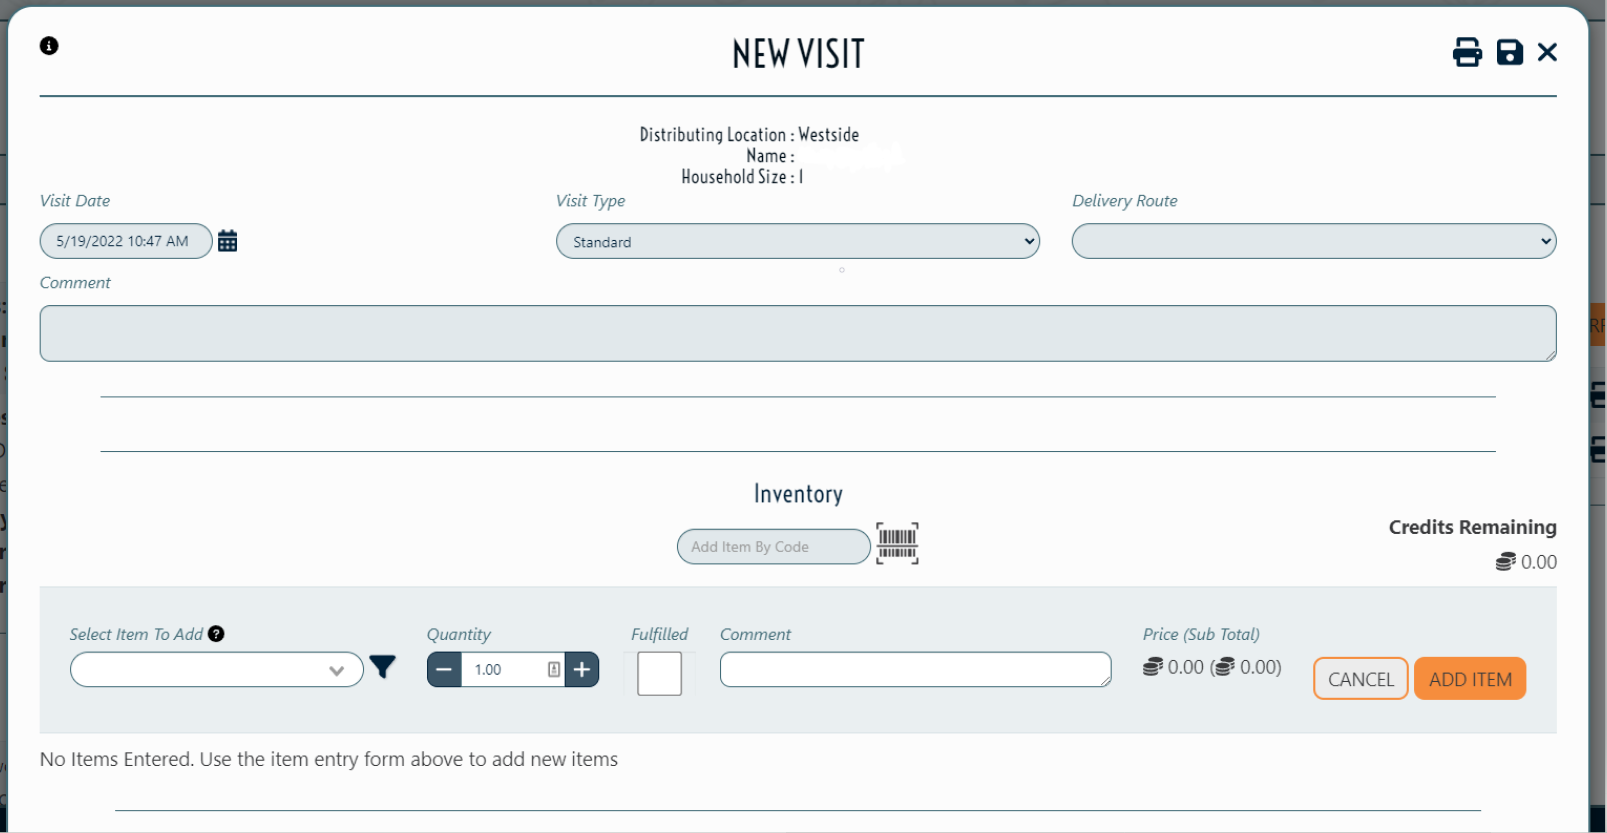
- Open New Visit Screen
Click New Visit. This will pop up a New Visit screen.
NOTE: Clicking Save and Exit at this point is sufficient for registering that the Client visited in this time range. Proceed only if you need to answer Visit Questions, fill in Comments, or add Inventory Items. - Answer Any Custom Visit Questions
If an admin has added custom visit questions to the visit screen, they will appear in a section just below the Visit Comment. Answer the questions.
NOTE: Unanswered required questions will prevent a successful save and exit and prompt an error message. - Add a Visit Comment (optional)
NOTE: Visit comments appear on the Staff Dashboard in the event roster next to the Date and Visit Type. This means they're extremely useful for adding quick notes your colleagues will notice right from the Staff Dashboard itself. - Add Visit Items (inventory feature)
To add Visit Items, perform the steps in Visit Items: Create/ Edit/ Delete below. - Save and Exit.
Click Save and Exit. - Verify the Visit on the Dashboard.
Verify your new visit is listed in the event roster inside the Visit widget.
Juggling Item Value and Weight. If your pantry turns on the Value and Weight fields, you might wonder how they interact with each other (i.e., "Total Value" interacting with "Unit Value"). While new Visit Items are initially populated with the values admins gave the Item during Item creation, in the visit you can directly change any of the four value and weight fields and the rest will adjust.
For Instance, changing a single one pound "Bag of Food" to five pounds total will automatically calculate the Unit Weight at five pounds. You've now created a variant of this item that has the name "Bag of Food" but weighs five pounds per unit instead of one.
Visit Items: Create / Edit / Delete
If your pantry records Visit Items (inventory is distributed and attached to specific clients; see Inventory Items (Item Templates)), your Visit screens will have a Visit Item section.
Perform the following steps to add Visit Items to a Visit while inside the New Visit or Edit Visit screens:
- Verify / Identify Inventory Item Section
If your pantry is set up with Visit Inventory Items (), identify the section toward the bottom of the Visit called Inventory Items. The section has:
- An Item Entry panel (see the dark gray area in the figure above)
- An Item Table below the Item Entry panel (a brand new/ empty table just has the message "No Items Entered..."). - Select an item
Select an Item under Select an Item to Add in the Item Entry section.
Bar Code Scanning: Alternatively, if you're using the bar code scanner, you can click into that field and scan an item bar code instead of manually selecting an item.
Missing Items: If items you've set up for your pantry are missing from the Item field in the visit, ask an admin to revisit the item in the Inventory Item screen and ensure that both the Active and Show on Visit checkboxes have been selected. - Add an Item
Verify or edit the readied item's details (e.g., Total Weight). When you're satisfied, click Add Item. - Edit an Added Item
Once a readied item is added to the list of checkout items below, you can edit the item by clicking it. This will:
- Highlight the edited item row
- Load its details back into the Readied Item section
Now you can edit the item's details again or delete the item altogether.
Click Save Item when you're finished with your edits and the highlighted row in question will adjust itself accordingly
Editing and Deleting a Visit
Perform the following steps to edit or delete a visit:
- Open Edit Visit screen
From the Staff Dashboard, click the edit pencil beside the target’s name. - If you are editing the visit, edit the desired fields and click Save and Exit.
- If you are deleting the visit, click Delete and confirm the delete. This will return the deleted visit's item quantities to Current Inventory.